2015-12-13 11:46:24 +01:00
|
|
|
# PowerDNS-Admin
|
|
|
|
|
PowerDNS Web-GUI - Built by Flask
|
|
|
|
|
|
2015-12-13 12:07:10 +01:00
|
|
|
#### Features:
|
2015-12-13 12:07:59 +01:00
|
|
|
- Multiple domain management
|
2015-12-13 12:07:10 +01:00
|
|
|
- Local / LDAP user authentication
|
2016-06-16 11:02:34 +02:00
|
|
|
- Support Two-factor authentication (TOTP)
|
2015-12-13 12:07:10 +01:00
|
|
|
- User management
|
2016-05-27 08:03:59 +02:00
|
|
|
- User access management based on domain
|
2015-12-13 12:07:10 +01:00
|
|
|
- User activity logging
|
|
|
|
|
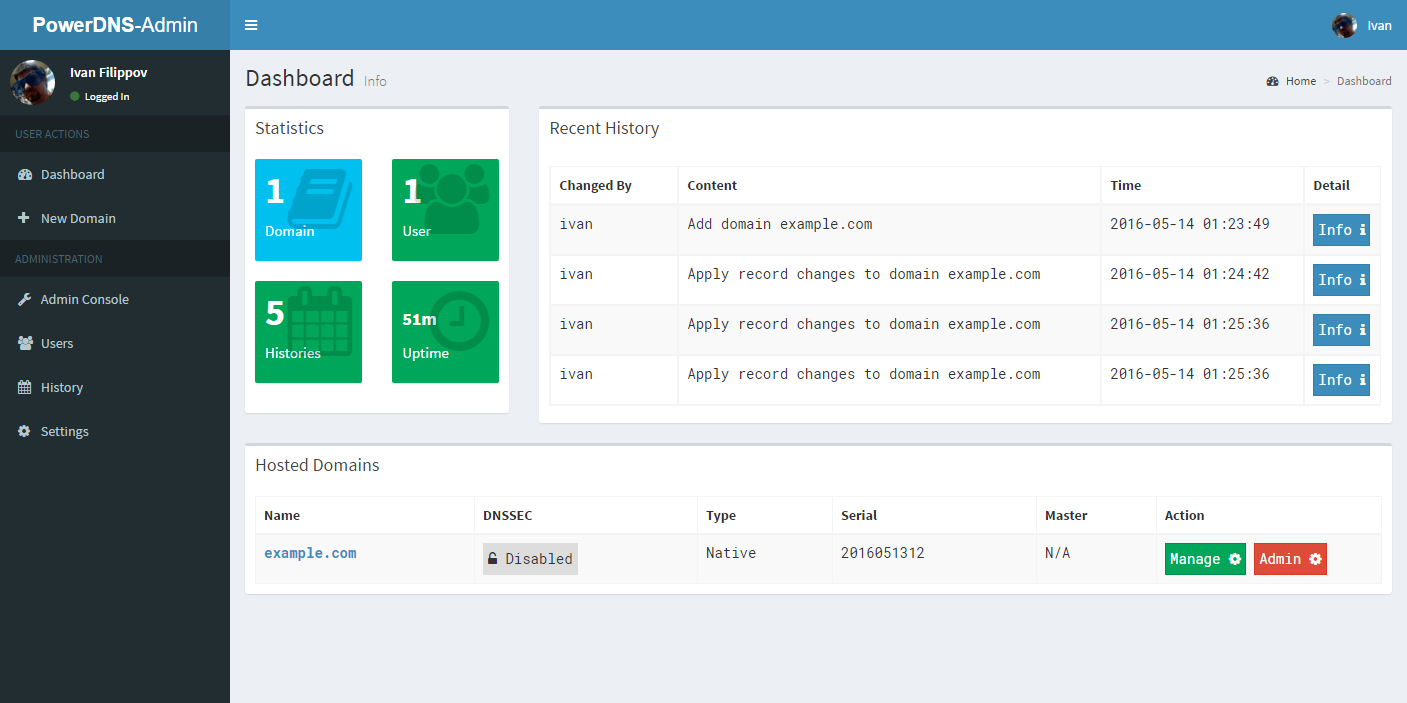
- Dashboard and pdns service statistics
|
2016-06-22 00:22:02 +02:00
|
|
|
- DynDNS 2 protocol support
|
2015-12-13 12:07:10 +01:00
|
|
|
|
2015-12-13 11:46:24 +01:00
|
|
|
## Setup
|
|
|
|
|
|
2016-05-27 08:03:59 +02:00
|
|
|
### PowerDNS Version Support:
|
2016-06-09 01:49:50 +02:00
|
|
|
PowerDNS-Admin supports PowerDNS autoritative server versions **3.4.2** and higher.
|
2016-05-27 08:03:59 +02:00
|
|
|
|
2015-12-13 11:46:24 +01:00
|
|
|
### pdns Service
|
|
|
|
|
I assume that you have already installed powerdns service. Make sure that your `/etc/pdns/pdns.conf` has these contents
|
2016-06-09 01:49:50 +02:00
|
|
|
|
|
|
|
|
PowerDNS 4.0.0 and later
|
|
|
|
|
```
|
|
|
|
|
api=yes
|
|
|
|
|
api-key=your-powerdns-api-key
|
|
|
|
|
webserver=yes
|
|
|
|
|
```
|
|
|
|
|
|
|
|
|
|
PowerDNS before 4.0.0
|
2015-12-13 11:46:24 +01:00
|
|
|
```
|
|
|
|
|
experimental-json-interface=yes
|
|
|
|
|
experimental-api-key=your-powerdns-api-key
|
|
|
|
|
webserver=yes
|
|
|
|
|
```
|
2016-06-09 01:49:50 +02:00
|
|
|
|
|
|
|
|
This will enable API access in PowerDNS so PowerDNS-Admin can intergrate with PowerDNS.
|
2015-12-13 11:46:24 +01:00
|
|
|
|
|
|
|
|
### Create Database
|
|
|
|
|
We will create a database which used by this web application. Please note that this database is difference from pdns database itself.
|
2016-08-12 10:15:38 +02:00
|
|
|
|
|
|
|
|
You could use any database that SQLAlchemy supports. For example MySQL (you will need to `pip install MySQL-python` to use MySQL backend):
|
2015-12-13 11:46:24 +01:00
|
|
|
```
|
|
|
|
|
MariaDB [(none)]> CREATE DATABASE powerdnsadmin;
|
|
|
|
|
|
2016-02-14 07:51:42 +01:00
|
|
|
MariaDB [(none)]> GRANT ALL PRIVILEGES ON powerdnsadmin.* TO powerdnsadmin@'%' IDENTIFIED BY 'your-password';
|
2015-12-13 11:46:24 +01:00
|
|
|
```
|
2016-08-12 10:15:38 +02:00
|
|
|
For testing purpose, you could also use SQLite as backend. This way you do not have to install `MySQL-python` dependency.
|
|
|
|
|
|
2015-12-13 11:46:24 +01:00
|
|
|
|
|
|
|
|
### PowerDNS-Admin
|
|
|
|
|
|
2016-05-27 08:03:59 +02:00
|
|
|
In this installation guide, I am using CentOS 7 and run my python stuffs with *virtualenv*. If you don't have it, lets install it:
|
2015-12-13 11:46:24 +01:00
|
|
|
```
|
|
|
|
|
$ sudo yum install python-pip
|
|
|
|
|
$ sudo pip install virtualenv
|
|
|
|
|
```
|
|
|
|
|
|
|
|
|
|
In your python web app directory, create a `flask` directory via `virtualenv`
|
|
|
|
|
```
|
|
|
|
|
$ virtualenv flask
|
|
|
|
|
```
|
|
|
|
|
|
|
|
|
|
Enable virtualenv and install python 3rd libraries
|
|
|
|
|
```
|
|
|
|
|
$ source ./flask/bin/activate
|
|
|
|
|
(flask)$ pip install -r requirements.txt
|
|
|
|
|
```
|
|
|
|
|
|
|
|
|
|
Web application configuration is stored in `config.py` file. Let's clone it from `config_template.py` file and then edit it
|
|
|
|
|
```
|
2016-04-13 18:11:10 +02:00
|
|
|
(flask)$ cp config_template.py config.py
|
2015-12-13 11:46:24 +01:00
|
|
|
(flask)$ vim config.py
|
|
|
|
|
```
|
|
|
|
|
|
|
|
|
|
Create database after having proper configs
|
2015-12-13 12:10:10 +01:00
|
|
|
```
|
2016-05-27 08:03:59 +02:00
|
|
|
(flask)% ./create_db.py
|
2015-12-13 12:10:10 +01:00
|
|
|
```
|
2015-12-13 11:46:24 +01:00
|
|
|
|
|
|
|
|
|
|
|
|
|
Run the application and enjoy!
|
|
|
|
|
```
|
|
|
|
|
(flask)$ ./run.py
|
|
|
|
|
```
|
2015-12-13 11:58:26 +01:00
|
|
|
|
2016-05-14 03:42:39 +02:00
|
|
|
### Screenshots
|
|
|
|
|

|
|
|
|
|
|
|
|
|
|

|
|
|
|
|

|
2016-06-16 11:02:34 +02:00
|
|
|

|
2016-05-14 03:42:39 +02:00
|
|
|
|