* Add suggested warning
* Update PR wording

---------

Co-authored-by: abraunegg <alex.braunegg@gmail.com>
11 KiB
How to configure OneDrive SharePoint Shared Library sync
WARNING: Several users have reported files being overwritten causing data loss as a result of using this client with SharePoint Libraries when running as a systemd service.
When this has been investigated, the following has been noted as potential root causes:
- File indexing application such as Baloo File Indexer or Tracker3 constantly indexing your OneDrive data
- The use of WPS Office and how it 'saves' files by deleting the existing item and replaces it with the saved data
Additionally there could be a yet unknown bug with the client, however all debugging and data provided previously shows that an 'external' process to the 'onedrive' application modifies the files triggering the undesirable upload to occur.
Possible Preventative Actions:
- Disable all File Indexing for your SharePoint Library data. It is out of scope to detail on how you should do this.
- Disable using a systemd service for syncing your SharePoint Library data.
- Do not use WPS Office to edit your documents. Use OpenOffice or LibreOffice as these do not exhibit the same 'delete to save' action that WPS Office has.
Additionally, please use caution when using this client with SharePoint.
Application Version
Before reading this document, please ensure you are running application version 
onedrive --version to determine what application version you are using and upgrade your client if required.
Process Overview
Syncing a OneDrive SharePoint library requires additional configuration for your 'onedrive' client:
- Login to OneDrive and under 'Shared Libraries' obtain the shared library name
- Query that shared library name using the client to obtain the required configuration details
- Create a unique local folder which will be the SharePoint Library 'root'
- Configure the client's config file with the required 'drive_id'
- Test the configuration using '--dry-run'
- Sync the SharePoint Library as required
Note: The --get-O365-drive-id process below requires a fully configured 'onedrive' configuration so that the applicable Drive ID for the given Office 365 SharePoint Shared Library can be determined. It is highly recommended that you do not use the application 'default' configuration directory for any SharePoint Site, and configure separate items for each site you wish to use.
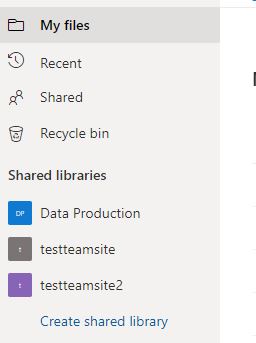
1. Listing available OneDrive SharePoint Libraries
Login to the OneDrive web interface and determine which shared library you wish to configure the client for:
2. Query OneDrive API to obtain required configuration details
Run the following command using the 'onedrive' client to query the OneDrive API to obtain the required 'drive_id' of the SharePoint Library that you wish to sync:
onedrive --get-O365-drive-id '<your site name to search>'
This will return something similar to the following:
Configuration file successfully loaded
Configuring Global Azure AD Endpoints
Initializing the Synchronization Engine ...
Office 365 Library Name Query: <your site name to search>
-----------------------------------------------
Site Name:    <your site name>
Library Name: <your library name>
drive_id:     b!6H_y8B...xU5
Library URL:  <your library URL>
-----------------------------------------------
If there are no matches to the site you are attempting to search, the following will be displayed:
Configuration file successfully loaded
Configuring Global Azure AD Endpoints
Initializing the Synchronization Engine ...
Office 365 Library Name Query: blah

ERROR: The requested SharePoint site could not be found. Please check it's name and your permissions to access the site.

The following SharePoint site names were returned:
 * <site name 1>
 * <site name 2>
 ...
 * <site name X>
This list of site names can be used as a basis to search for the correct site for which you are searching
3. Create a new configuration directory and sync location for this SharePoint Library
Create a new configuration directory for this SharePoint Library in the following manner:
mkdir ~/.config/SharePoint_My_Library_Name
Create a new local folder to store the SharePoint Library data in:
mkdir ~/SharePoint_My_Library_Name
Note: Do not use spaces in the directory name, use '_' as a replacement
4. Configure SharePoint Library config file with the required 'drive_id' & 'sync_dir' options
Download a copy of the default configuration file by downloading this file from GitHub and saving this file in the directory created above:
wget https://raw.githubusercontent.com/abraunegg/onedrive/master/config -O ~/.config/SharePoint_My_Library_Name/config
Update your 'onedrive' configuration file (~/.config/SharePoint_My_Library_Name/config) with the local folder where you will store your data:
sync_dir = "~/SharePoint_My_Library_Name"
Update your 'onedrive' configuration file(~/.config/SharePoint_My_Library_Name/config) with the 'drive_id' value obtained in the steps above:
drive_id = "insert the drive_id value from above here"
The OneDrive client will now be configured to sync this SharePoint shared library to your local system and the location you have configured.
Note: After changing drive_id, you must perform a full re-synchronization by adding --resync to your existing command line.
5. Validate and Test the configuration
Validate your new configuration using the --display-config option to validate you have configured the application correctly:
onedrive --confdir="~/.config/SharePoint_My_Library_Name" --display-config
Test your new configuration using the --dry-run option to validate the application configuration:
onedrive --confdir="~/.config/SharePoint_My_Library_Name" --synchronize --verbose --dry-run
Note: As this is a new configuration, the application will be required to be re-authorised the first time this command is run with the new configuration.
6. Sync the SharePoint Library as required
Sync the SharePoint Library to your system with either --synchronize or --monitor operations:
onedrive --confdir="~/.config/SharePoint_My_Library_Name" --synchronize --verbose
onedrive --confdir="~/.config/SharePoint_My_Library_Name" --monitor --verbose
Note: As this is a new configuration, the application will be required to be re-authorised the first time this command is run with the new configuration.
7. Enable custom systemd service for SharePoint Library
Systemd can be used to automatically run this configuration in the background, however, a unique systemd service will need to be setup for this SharePoint Library instance
In order to automatically start syncing each SharePoint Library, you will need to create a service file for each SharePoint Library. From the applicable 'systemd folder' where the applicable systemd service file exists:
- RHEL / CentOS:
/usr/lib/systemd/system - Others:
/usr/lib/systemd/userand/lib/systemd/system
Step1: Create a new systemd service file
Red Hat Enterprise Linux, CentOS Linux
Copy the required service file to a new name:
sudo cp /usr/lib/systemd/system/onedrive.service /usr/lib/systemd/system/onedrive-SharePoint_My_Library_Name.service
or
sudo cp /usr/lib/systemd/system/onedrive@.service /usr/lib/systemd/system/onedrive-SharePoint_My_Library_Name@.service
Others such as Arch, Ubuntu, Debian, OpenSuSE, Fedora
Copy the required service file to a new name:
sudo cp /usr/lib/systemd/user/onedrive.service /usr/lib/systemd/user/onedrive-SharePoint_My_Library_Name.service
or
sudo cp /lib/systemd/system/onedrive@.service /lib/systemd/system/onedrive-SharePoint_My_Library_Name@.service
Step 2: Edit new systemd service file
Edit the new systemd file, updating the line beginning with ExecStart so that the confdir mirrors the one you used above:
ExecStart=/usr/local/bin/onedrive --monitor --confdir="/full/path/to/config/dir"
Example:
ExecStart=/usr/local/bin/onedrive --monitor --confdir="/home/myusername/.config/SharePoint_My_Library_Name"
Note: When running the client manually, --confdir="~/.config/...... is acceptable. In a systemd configuration file, the full path must be used. The ~ must be expanded.
Step 3: Enable the new systemd service
Once the file is correctly editied, you can enable the new systemd service using the following commands.
Red Hat Enterprise Linux, CentOS Linux
systemctl enable onedrive-SharePoint_My_Library_Name
systemctl start onedrive-SharePoint_My_Library_Name
Others such as Arch, Ubuntu, Debian, OpenSuSE, Fedora
systemctl --user enable onedrive-SharePoint_My_Library_Name
systemctl --user start onedrive-SharePoint_My_Library_Name
or
systemctl --user enable onedrive-SharePoint_My_Library_Name@myusername.service
systemctl --user start onedrive-SharePoint_My_Library_Name@myusername.service
Step 4: Viewing systemd status and logs for the custom service
Viewing systemd service status - Red Hat Enterprise Linux, CentOS Linux
systemctl status onedrive-SharePoint_My_Library_Name
Viewing systemd service status - Others such as Arch, Ubuntu, Debian, OpenSuSE, Fedora
systemctl --user status onedrive-SharePoint_My_Library_Name
Viewing journalctl systemd logs - Red Hat Enterprise Linux, CentOS Linux
journalctl --unit=onedrive-SharePoint_My_Library_Name -f
Viewing journalctl systemd logs - Others such as Arch, Ubuntu, Debian, OpenSuSE, Fedora
journalctl --user --unit=onedrive-SharePoint_My_Library_Name -f
Step 5: (Optional) Run custom systemd service at boot without user login
In some cases it may be desirable for the systemd service to start without having to login as your 'user'
All the systemd steps above that utilise the --user option, will run the systemd service as your particular user. As such, the systemd service will not start unless you actually login to your system.
To avoid this issue, you need to reconfigure your 'user' account so that the systemd services you have created will startup without you having to login to your system:
loginctl enable-linger <your_user_name>
Example:
alex@ubuntu-headless:~$ loginctl enable-linger alex
8. Configuration for a SharePoint Library is complete
The 'onedrive' client configuration for this particular SharePoint Library is now complete.
How to configure multiple OneDrive SharePoint Shared Library sync
Create a new configuration as per the process above. Repeat these steps for each SharePoint Library that you wish to use.