mirror of
https://github.com/chidiwilliams/buzz.git
synced 2026-03-14 22:55:46 +01:00
180 lines
10 KiB
Markdown
180 lines
10 KiB
Markdown
# Buzz
|
|
|
|
Transcribe and translate audio offline on your personal computer. Powered by
|
|
OpenAI's [Whisper](https://github.com/openai/whisper).
|
|
|
|

|
|
[](https://github.com/chidiwilliams/buzz/actions/workflows/ci.yml)
|
|
[](https://codecov.io/github/chidiwilliams/buzz)
|
|

|
|
[](https://GitHub.com/chidiwilliams/buzz/releases/)
|
|
|
|

|
|
|
|
## Features
|
|
|
|
- Real-time transcription and translation from your computer's microphones to
|
|
text ([Demo](https://www.loom.com/share/564b753eb4d44b55b985b8abd26b55f7))
|
|
- Import audio and video files and export transcripts to TXT, SRT, and
|
|
VTT ([Demo](https://www.loom.com/share/cf263b099ac3481082bb56d19b7c87fe))
|
|
- Supports [Whisper](https://github.com/openai/whisper#available-models-and-languages),
|
|
[Whisper.cpp](https://github.com/ggerganov/whisper.cpp),
|
|
and [Whisper-compatible Hugging Face models](https://huggingface.co/models?other=whisper)
|
|
|
|
## Installation
|
|
|
|
To install Buzz, download the [latest version](https://github.com/chidiwilliams/buzz/releases/latest) for your operating
|
|
system. Buzz is available on **Mac**, **Windows**, and **Linux**.
|
|
|
|
### Mac (macOS 11.7 and later)
|
|
|
|
- Install via [brew](https://brew.sh/):
|
|
|
|
```shell
|
|
brew install --cask buzz
|
|
```
|
|
|
|
Alternatively, download and run the `Buzz-x.y.z.dmg` file.
|
|
|
|
### Windows (Windows 10 and later)
|
|
|
|
- Download and run the `Buzz-x.y.z.exe` file.
|
|
|
|
### Linux (Ubuntu 20.04 and later)
|
|
|
|
- Install dependencies:
|
|
|
|
```shell
|
|
sudo apt-get install libportaudio2
|
|
```
|
|
|
|
- Download and extract the `Buzz-x.y.z-unix.tar.gz` file
|
|
|
|
## How to use
|
|
|
|
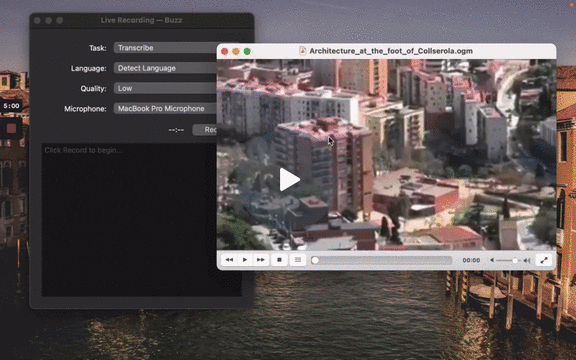
### Live Recording
|
|
|
|
To start a live recording:
|
|
|
|
- Select a recording task, language, quality, and microphone.
|
|
- Click Record.
|
|
|
|
> **Note:** Transcribing audio using the default Whisper model is resource-intensive. If your computer is unable to keep
|
|
> up with real-time transcription, consider turning on [GGML inference](#enable-ggml-inference).
|
|
|
|
| Field | Options | Default | Description |
|
|
|------------|------------------------------------------------------------------------------------------------------------------------------------------|-----------------------------|-------------------------------------------------------------------------------------------------------------------------------------------------------------------------------------------------------------------------------------------------------------------------------------------------------------------------------------------------------------------------------------------------------------------------------------------------------|
|
|
| Task | "Transcribe", "Translate" | "Transcribe" | "Transcribe" converts the input audio into text in the selected language, while "Translate" converts it into text in English. |
|
|
| Language | See [Whisper's documentation](https://github.com/openai/whisper#available-models-and-languages) for the full list of supported languages | "Detect Language" | "Detect Language" will try to detect the spoken language in the audio based on the first few seconds. However, selecting a language is recommended (if known) as it will improve transcription quality in many cases. |
|
|
| Quality | "Very Low", "Low", "Medium", "High" | "Very Low" | The transcription quality determines the Whisper model used for transcription. "Very Low" uses the "tiny" model; "Low" uses the "base" model; "Medium" uses the "small" model; and "High" uses the "medium" model. The larger models produce higher-quality transcriptions, but require more system resources. See [Whisper's documentation](https://github.com/openai/whisper#available-models-and-languages) for more information about the models. |
|
|
| Microphone | [Available system microphones] | [Default system microphone] | Microphone for recording input audio. |
|
|
|
|
[](https://www.loom.com/share/564b753eb4d44b55b985b8abd26b55f7 'Live Recording on Buzz')
|
|
|
|
### Record audio playing from computer
|
|
|
|
To record audio playing from an application on your computer, you may install an audio loopback driver (a program that
|
|
lets you create virtual audio devices). The rest of this guide will
|
|
use [BlackHole](https://github.com/ExistentialAudio/BlackHole) on Mac, but you can use other alternatives for your
|
|
operating system (
|
|
see [LoopBeAudio](https://nerds.de/en/loopbeaudio.html), [LoopBack](https://rogueamoeba.com/loopback/),
|
|
and [Virtual Audio Cable](https://vac.muzychenko.net/en/)).
|
|
|
|
1. Install [BlackHole via Homebrew](https://github.com/ExistentialAudio/BlackHole#option-2-install-via-homebrew)
|
|
|
|
```shell
|
|
brew install blackhole-2ch
|
|
```
|
|
|
|
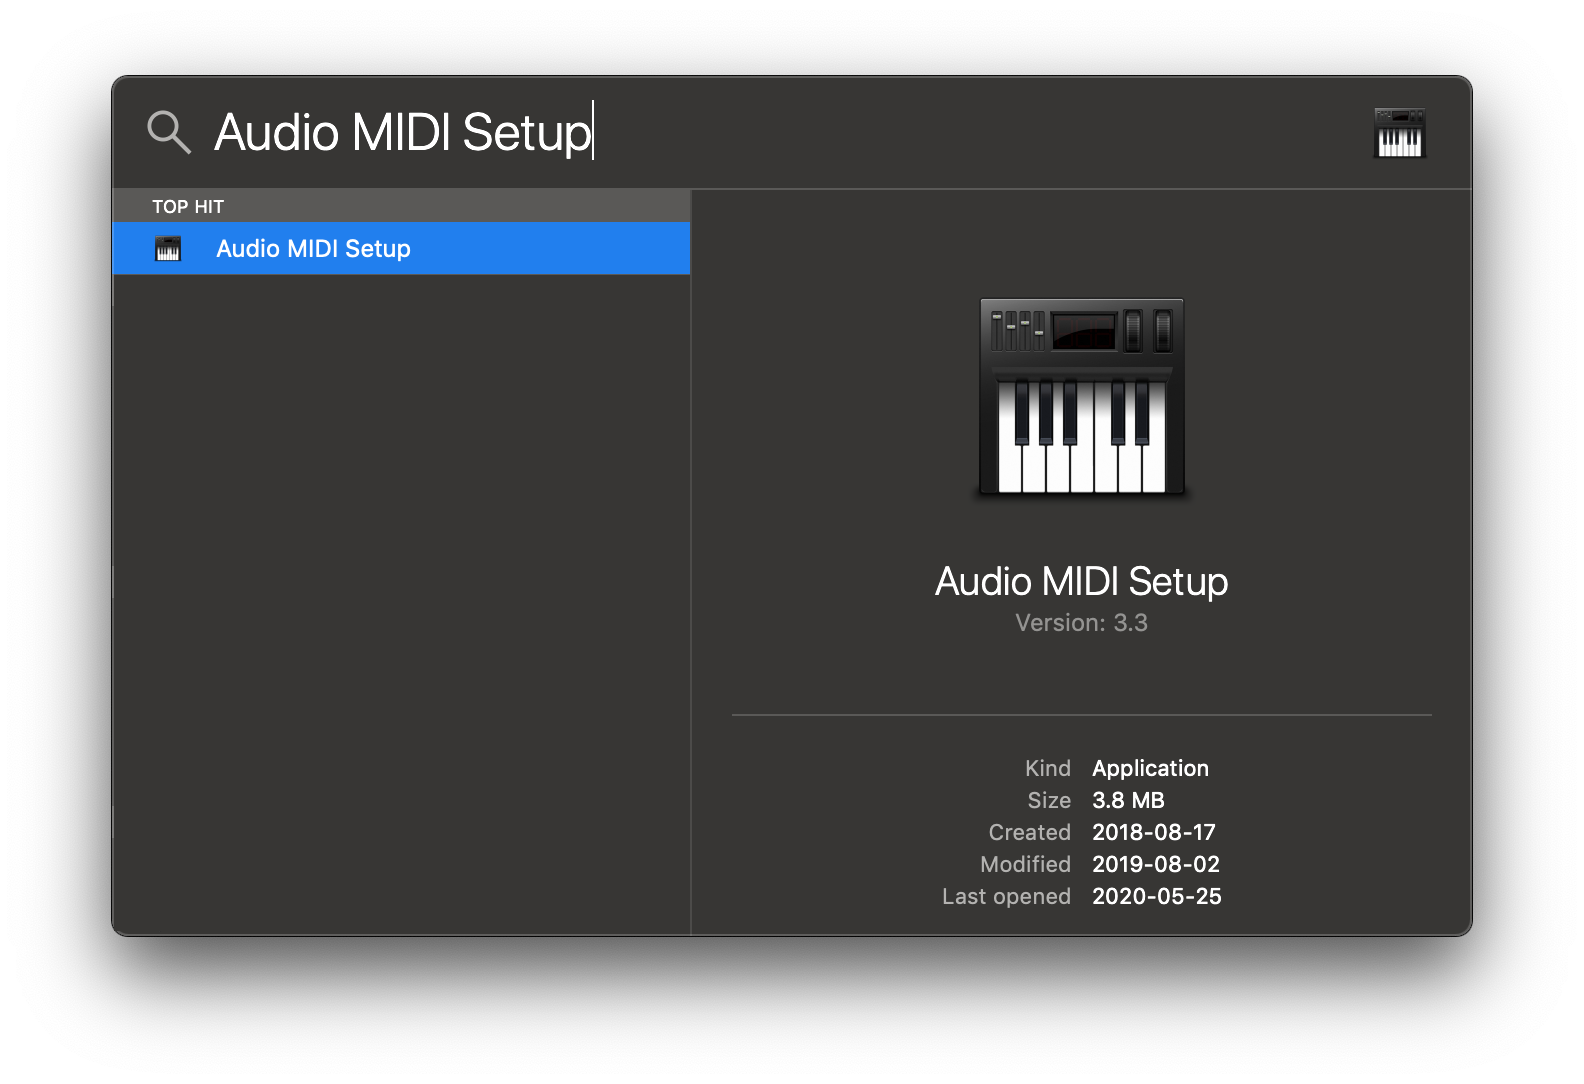
2. Open Audio MIDI Setup from Spotlight or from `/Applications/Utilities/Audio Midi Setup.app`.
|
|
|
|
|
|
|
|
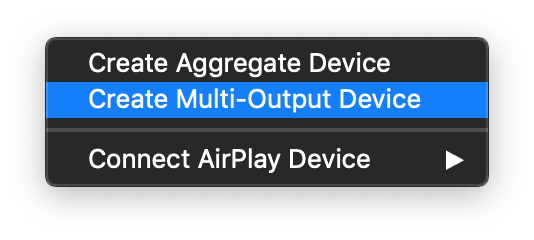
3. Click the '+' icon at the lower left corner and select 'Create Multi-Output Device'.
|
|
|
|
|
|
|
|
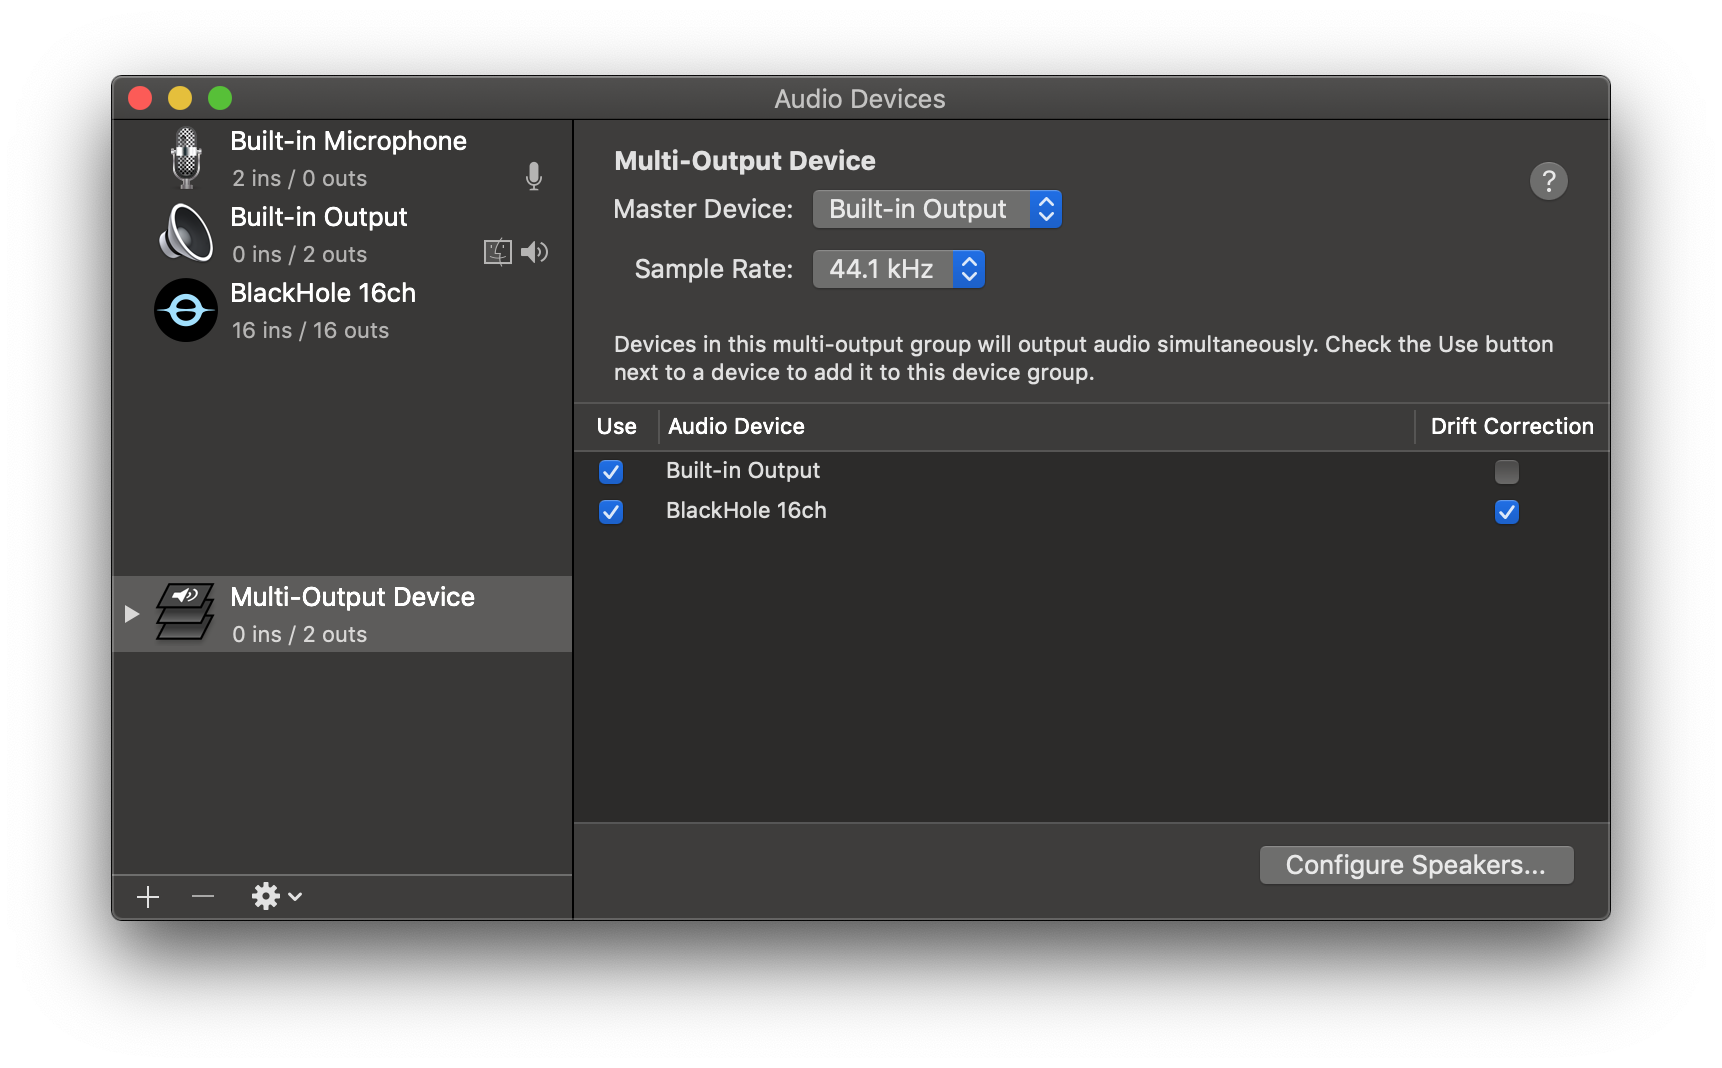
4. Add your default speaker and BlackHole to the multi-output device.
|
|
|
|
|
|
|
|
5. Select this multi-output device as your speaker (application or system-wide) to play audio into BlackHole.
|
|
|
|
6. Open Buzz, select BlackHole as your microphone, and record as before to see transcriptions from the audio playing
|
|
through BlackHole.
|
|
|
|
## File import
|
|
|
|
To import a file:
|
|
|
|
- Click Import Media File on the File menu (or the '+' icon on the toolbar, or **Command/Ctrl + O**).
|
|
- Choose an audio or video file.
|
|
- Select a task, language, and the model settings.
|
|
- Click Run.
|
|
- When the transcription status shows 'Completed', double-click on the row (or select the row and click the '⤢' icon) to
|
|
open the transcription.
|
|
|
|
| Field | Options | Default | Description |
|
|
|--------------------|---------------------|---------|----------------------------------------------------------------------------------------------------------------------------------------------------------|
|
|
| Export As | "TXT", "SRT", "VTT" | "TXT" | Export file format |
|
|
| Word-Level Timings | Off / On | Off | If checked, the transcription will generate a separate subtitle line for each word in the audio. Enabled only when "Export As" is set to "SRT" or "VTT". |
|
|
|
|
(See the [Live Recording section](#live-recording) for more information about the task, language, and quality settings.)
|
|
|
|
[](https://www.loom.com/share/cf263b099ac3481082bb56d19b7c87fe 'Media File Import on Buzz')
|
|
|
|
## Build
|
|
|
|
To build/run Buzz locally from source, first install the requirements:
|
|
|
|
1. [Poetry](https://python-poetry.org/docs/#installing-with-the-official-installer)
|
|
|
|
Then:
|
|
|
|
1. Clone the repository
|
|
|
|
```shell
|
|
git clone --recurse-submodules https://github.com/chidiwilliams/buzz
|
|
```
|
|
|
|
2. Install the project dependencies.
|
|
|
|
```shell
|
|
poetry install
|
|
```
|
|
|
|
3. (Optional) To use Whisper.cpp inference, run:
|
|
|
|
```shell
|
|
make buzz/whisper_cpp.py
|
|
```
|
|
|
|
4. (Optional) To compile the translations, run:
|
|
|
|
```shell
|
|
make translation_mo
|
|
```
|
|
|
|
5. Finally, run the app with:
|
|
|
|
```shell
|
|
poetry run python main.py
|
|
```
|
|
|
|
Or build with:
|
|
|
|
```shell
|
|
poetry run pyinstaller --noconfirm Buzz.spec
|
|
```
|
|
|
|
## FAQ
|
|
|
|
1. **Where are the models stored?**
|
|
|
|
The Whisper models are stored in `~/.cache/whisper`. The Whisper.cpp models are stored in `~/Library/Caches/Buzz` (
|
|
Mac OS), `~/.cache/Buzz` (Unix), or `C:\Users\<username>\AppData\Local\Buzz\Buzz\Cache` (Windows). The Hugging Face
|
|
models are stored in `~/.cache/huggingface/hub`.
|
|
|
|
2. **What can I try if the transcription runs too slowly?**
|
|
|
|
Try using a lower Whisper model size or using a Whisper.cpp model.
|